How to Set Up a Fish Tank- The Complete Beginner Guide (2026)
Most first fish tanks fail in the same predictable way. The tank goes up on a Saturday, fish go in on Sunday, and by the following weekend half of them are dead — with the owner convinced they did something wrong with the water, the food, or the fish themselves. In almost every case, the actual cause is simpler and more preventable: the tank was never cycled. The nitrogen cycle — the biological process that makes an aquarium safe for fish — takes 4–6 weeks to establish, and no amount of water conditioner or pet store advice shortcuts it. Set up the tank correctly from the start, and you have a stable, healthy aquarium that will run for years with straightforward maintenance. Skip the cycle, and you have an expensive fish cemetery. This guide walks you through every step in the correct order — from the right tank size to the first fish — with the honest timing and reasoning that beginner guides typically skip.
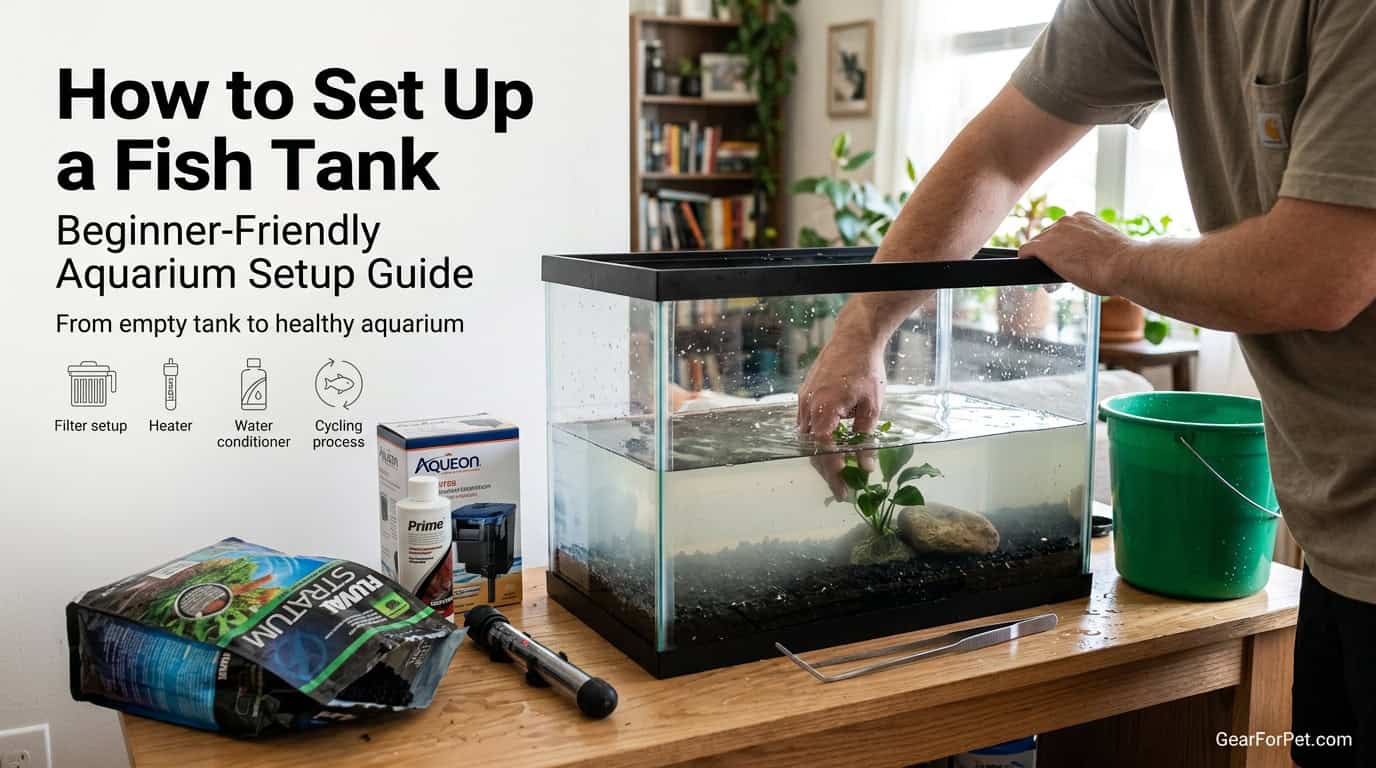
What You Need Before You Start — Equipment Checklist
Before buying a single fish, you need every item on this list. Setting up in the right sequence with complete equipment is what separates a successful first tank from a frustrating one.
| Item | Why You Need It | Can You Skip It? |
|---|---|---|
| Tank + lid | Primary enclosure — lid prevents evaporation and jumping | ❌ No |
| Aquarium filter | Biological, mechanical, and chemical filtration — houses the nitrogen cycle bacteria | ❌ No |
| Aquarium heater | Maintains stable target temperature for tropical species | ❌ No (for tropical fish) |
| Digital thermometer | Independently verifies actual water temperature | ❌ No |
| Substrate (gravel or sand) | Aesthetic + biological surface area for beneficial bacteria | 🟡 Optional but recommended |
| Water conditioner (dechlorinator) | Neutralises chlorine and chloramine in tap water — essential before adding any water | ❌ No |
| Liquid water test kit | Tests ammonia, nitrite, nitrate, and pH — the only way to know when the cycle is complete | ❌ No — test strips are not accurate enough |
| Ammonia source (for fishless cycling) | Feeds the bacteria colony during the cycle — pure ammonia or an ammonia product | ❌ No (for fishless cycling) |
| Decorations / hardscape | Provides cover and reduces fish stress — hiding spots are welfare, not aesthetics | 🟡 Optional but fish do better with them |
| Aquarium light | Required for planted tanks and viewing; a day/night cycle benefits fish behaviour | 🟡 Required for plants; optional for fish-only |
| Sturdy stand or surface | Water weighs ~8.3 lbs per gallon — a 20-gallon tank with gravel and décor weighs 200+ lbs | ❌ No — regular furniture is not rated for this |
| Bucket (dedicated to aquarium use only) | Water changes — never use a bucket that has had cleaning products in it | ❌ No |
Step 1 — Choose the Right Tank Size
The single most counterintuitive truth in fishkeeping is that bigger tanks are easier to maintain than smaller ones. Not harder — easier. Water chemistry in a larger volume is more stable, temperature swings are smaller, waste dilutes more effectively, and the margin for error is larger. The 5-gallon betta tank is a harder tank to keep stable than a 20-gallon community tank. This does not mean beginners must start with a large tank — but it does mean the “start small” advice often sets new fishkeepers up for more difficulty, not less.
Recommended Starting Tank Sizes
| Tank Size | Best For | Difficulty | Notes |
|---|---|---|---|
| 5–10 gallons | Single betta, shrimp tank, nano species | 🔴 Harder than it looks | Small volume = rapid parameter swings; requires more frequent monitoring |
| 20 gallons | Beginner community tank — the sweet spot | 🟢 Best for beginners | Forgiving chemistry, room for a small school, widely available equipment |
| 29–40 gallons | Intermediate community, planted tanks | 🟢 Easy to manage | More species options, more stable — excellent second tank upgrade |
| 55–75 gallons | Experienced community, cichlids, larger species | 🟡 More equipment cost | Very stable water chemistry; cost of equipment and stocking increases |
The recommendation for most beginners: Start with a 20-gallon long tank. It is the most widely recommended beginner setup in the hobby for good reason — stable enough to be forgiving, large enough for a satisfying community of fish, small enough that equipment costs and maintenance time are manageable.
Step 2 — Choose the Right Location
Tank placement is a permanent decision — a full aquarium cannot be moved. Choose carefully before filling.
- Never place near a window with direct sunlight — sunlight causes explosive algae growth, dramatic temperature swings throughout the day, and eventually a tank you cannot see through. Natural light is not a substitute for an aquarium light.
- Away from heat sources and air conditioning vents — radiators, heating vents, and AC units all create temperature fluctuations that stress fish and make your heater work against external forces rather than maintaining steady temperature.
- Near a power outlet — heater, filter, and light each need power. An extension cord running across the room is a tripping and water damage hazard. Position where all three can reach a wall outlet within 6 feet.
- On a surface rated for the weight — calculate 10 lbs per gallon as a safe total weight estimate (water + tank + gravel + décor). A 20-gallon tank is 200 lbs. Dedicate an aquarium stand or a piece of furniture explicitly rated for this load — a standard bookshelf is not adequate.
- Level surface is non-negotiable — a tank that is not perfectly level places uneven stress on the glass seams and silicone. Use a spirit level during placement. Shim if necessary.
- Near a water source — water changes are a regular weekly task. A tank placed far from a sink means carrying heavy buckets across the house repeatedly. Proximity to a bathroom or kitchen sink makes maintenance realistic and sustainable.
Step 3 — Rinse and Build
Rinse Everything — But Never Use Soap
Rinse the tank, substrate, and all decorations with plain water before use. Gravel and sand often contain dust and debris from manufacturing and shipping that will cloud your water if added directly. Rinse gravel in a bucket until the runoff runs clear — this typically takes 5–10 minutes of agitation per bag. Never use soap, detergent, or any cleaning product on anything that will go in the tank — trace residue is toxic to fish and nearly impossible to fully rinse away. If something needs more than plain water to clean, it is not suitable for aquarium use.
Add Substrate
Add rinsed substrate to a dry tank first — before adding water. Aim for approximately 2 inches of depth for gravel, or 1–1.5 inches for sand (sand compacts more than gravel). Slope slightly toward the front for visual depth. Deeper substrate areas can develop anaerobic pockets in sand — avoid exceeding 3 inches in any substrate type without deliberate planted tank design considerations.
Add Decorations and Hardscape
Add decorations, rocks, and driftwood before filling with water. Arrange with fish behaviour in mind — not just visual aesthetics. Every fish species benefits from visual breaks (decorations that break line of sight between fish) and hiding spaces (caves, dense planting areas, driftwood overhangs). A tank with no cover produces chronically stressed fish that spend most of their time hiding in corners. A tank with appropriate cover produces fish that explore their space confidently.
Install Filter and Heater — But Don’t Plug In Yet
Position the filter according to manufacturer instructions — typically at the back of the tank near one end, with the output directed across the surface to maximise gas exchange. Position the heater near the filter output so circulation distributes heat evenly. Do not plug in either unit yet — the heater must be fully submerged before powering on, and the filter should not run dry. Both go in now, power comes later.
Step 4 — Fill With Treated Water
Fill the tank with tap water, but treat it correctly before it is safe for fish or beneficial bacteria.
Why Tap Water Needs Treatment
Municipal tap water contains chlorine or chloramine — disinfectants added to kill bacteria in the water supply. These same chemicals kill the beneficial bacteria that your tank needs to establish the nitrogen cycle, and are directly toxic to fish. A quality water conditioner (dechlorinator) neutralises chlorine and chloramine instantly. Add the correct dose for your tank volume to the bucket before filling, or dose the tank directly as you fill it — either approach works. Do not skip this step or assume the chlorine will “off-gas” on its own — chloramine does not evaporate.
How to Fill Without Disturbing the Substrate
Pour water onto a plate, flat rock, or your hand placed on top of the substrate — this disperses the water flow and prevents the current from digging craters in sand or displacing carefully arranged gravel. For sand especially, this step prevents the frustrating experience of watching your substrate rearrange itself as you fill.
Fill to About 1 Inch Below the Lid
Leave an air gap at the top — this space is important for gas exchange at the water surface and prevents water from sloshing out during filter-generated surface movement. Most tanks fill to approximately 1 inch below the frame.
Step 5 — Start Equipment and Check Temperature
Now — and only now — plug in the filter and heater.
- Filter: Should run immediately. Listen for the motor — a loud rattling often indicates an air pocket in the intake. Prime the filter if needed per the manufacturer’s instructions. The water flow should be visible within a minute of powering on.
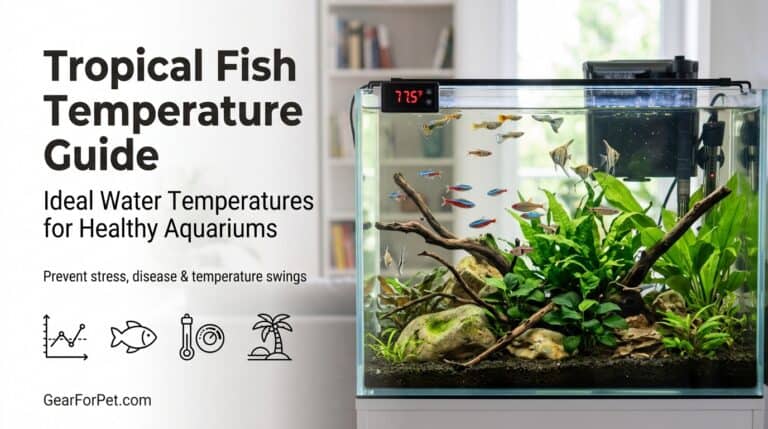
- Heater: Set to your target temperature for the fish species you plan to keep. Refer to the Tropical Fish Temperature Guide for species-specific requirements. Allow 24 hours for the tank to reach target temperature before verifying.
- Thermometer: Position the independent digital thermometer at the opposite end of the tank from the heater. Check after 24 hours and compare to the heater’s set point. A discrepancy of more than 2°F indicates a heater calibration or positioning issue — address before proceeding.
- Light: Set on a timer for a consistent 8–10 hour day cycle. Consistent photoperiod reduces fish stress and controls algae growth better than irregular light schedules.
Step 6 — The Nitrogen Cycle (The Step Most Beginners Skip)
This is the most important section in this guide — and the step that determines whether your tank succeeds or fails in the first month. Read it fully before proceeding.
What the Nitrogen Cycle Is
Fish produce ammonia continuously through respiration and waste. Ammonia is acutely toxic to fish — even at low concentrations, it damages gill tissue and suppresses immune function. The nitrogen cycle is the biological process by which two types of beneficial bacteria establish themselves in your filter media and substrate to convert this toxic ammonia into progressively less harmful compounds:
- Ammonia (NH₃) → converted by Nitrosomonas bacteria → Nitrite (NO₂)
- Nitrite (NO₂) → converted by Nitrospira bacteria → Nitrate (NO₃)
- Nitrate (NO₃) → removed by regular water changes (or consumed by live plants)
A cycled tank is one where both bacterial colonies are fully established and processing ammonia and nitrite to zero as fast as fish produce them. An uncycled tank has no bacteria — ammonia spikes, fish are poisoned, and the owner usually blames everything except the actual cause.
How Long Does Cycling Take?
A fishless cycle — the safest and recommended method — takes 4–6 weeks from a cold start. There is no reliable way to shorten this to under 3 weeks without seeding with established filter media from a cycled tank. Products claiming to instantly cycle a tank provide a small bacterial seed that still requires weeks to multiply to a functional colony under a real fish load. Use them as a supplement to the cycle process, not a replacement for it.
How to Cycle Your Tank — Fishless Method
- Add pure ammonia to the tank — dose to reach 2–4 ppm ammonia as measured by your liquid test kit. Use pure ammonia (no surfactants — shake the bottle, if it foams it is unsuitable) or a dedicated aquarium ammonia product. This feeds the bacteria colony you are growing.
- Test every 2–3 days — using your liquid test kit, test ammonia, nitrite, and nitrate. Record the results.
- Week 1–2: Ammonia climbs, then nitrite appears — as Nitrosomonas bacteria establish, ammonia levels begin to drop and nitrite begins to rise. Rising nitrite is a sign the cycle is progressing.
- Week 2–4: Nitrite peaks, nitrate appears — nitrite rises significantly as the first bacteria process ammonia but before the second bacteria establish. This is the peak of the cycle. Maintain ammonia dosing to keep feeding the growing colony.
- Week 4–6: Nitrite drops to zero, nitrate rises — as Nitrospira bacteria establish, nitrite processes to zero and nitrate begins accumulating. This is the signal the cycle is completing.
- The cycle is complete when: you dose to 2 ppm ammonia and both ammonia and nitrite read zero within 24 hours. Nitrate will be elevated — do a large water change (50–70%) to bring it down before adding fish.
Speeding Up the Cycle Safely
- Seed with established filter media — a handful of gravel, a piece of filter media, or a small filter sponge from a healthy cycled tank transfers billions of established bacteria and can cut cycle time to 1–2 weeks
- Use a bacterial supplement — products like Tetra SafeStart, Seachem Stability, or Dr. Tim’s One-and-Only contain live bacteria cultures that genuinely accelerate the process when used correctly
- Keep the temperature at 80–82°F during cycling — bacterial reproduction rate is temperature-dependent; warmer water speeds colony establishment (lower the temperature to your target species range before adding fish)
- Ensure the filter runs continuously — the bacteria are aerobic; they need oxygenated water flow through the filter media at all times. Turning off the filter for even 24 hours during an early cycle can crash the developing colony
Why Fish-In Cycling Is Not Recommended
Fish-in cycling — adding fish to an uncycled tank and performing daily water changes to dilute ammonia while the cycle establishes — is a welfare compromise that exposes fish to ammonia and nitrite poisoning throughout the 4–6 week process. It produces higher fish mortality, chronic stress, and disease susceptibility in the fish that survive. Fishless cycling is always the better approach for a new tank. If you have already added fish to an uncycled tank, test daily and perform large water changes whenever ammonia or nitrite exceeds 0.25 ppm.
Step 7 — Add Fish (Correctly)
The cycle is complete. Ammonia and nitrite both read zero within 24 hours of a 2 ppm ammonia dose. You have done a large water change. Now — and only now — you are ready to add fish.
Stock Slowly
Add no more than 25–30% of your planned fish population in the first week. Even a fully cycled tank’s bacterial colony is calibrated to the ammonia load it has been processing — a sudden large increase in bioload (fish population) can temporarily overwhelm the colony before it has time to multiply to meet the new demand. A mini-cycle with a small ammonia spike is common after first stocking. Adding slowly gives the bacteria time to catch up incrementally.
Acclimate Fish to Your Water Temperature
Float the sealed bag your fish arrived in on the water surface for 15–20 minutes before releasing them. This allows the bag water temperature to equalise gradually to your tank temperature, preventing thermal shock. Do not simply open the bag and pour the fish in — the temperature change from a pet store bag to your tank can easily be 5–10°F, which is sufficient to trigger immediate stress and immune suppression.
Do Not Add Pet Store Water to Your Tank
Use a net to transfer fish from the bag to your tank — do not pour the bag water into your tank. Pet store water can introduce pathogens, parasites, and bacteria from their system to yours. Net the fish and discard the bag water.
Turn Off the Light for the First Few Hours
New fish in an unfamiliar environment are highly stressed. A dark or dim tank for the first 2–4 hours after introduction allows them to find hiding spots and begin to orient themselves without the additional stress of a lit, fully visible environment. Resume your normal light cycle the following day.
Step 8 — Ongoing Maintenance Schedule
A properly set up, cycled aquarium requires surprisingly little maintenance — but it requires it consistently. Skipping weekly water changes is the most common cause of slow-onset fish health problems in established tanks.
| Task | Frequency | Why It Matters |
|---|---|---|
| Check temperature (independent thermometer) | Daily — takes 5 seconds | Catches heater drift or failure before fish are affected |
| Feed fish | Once or twice daily — what they consume in 2 minutes | Overfeeding is the single most common water quality problem in home aquariums |
| Visual health check | Daily at feeding | Spot abnormal behaviour, fin damage, or signs of disease early |
| Water change (25–30%) | Weekly | Removes accumulated nitrates, replenishes minerals — non-negotiable |
| Gravel vacuum | Weekly (during water change) | Removes organic waste from substrate before it decomposes into ammonia |
| Glass cleaning | Weekly or as needed | Algae on glass is normal — a magnetic scraper makes this a 2-minute task |
| Full water parameter test | Weekly for first month; monthly thereafter | Ammonia and nitrite should always read zero in a cycled tank — any reading above zero is an emergency |
| Filter media rinse | Monthly — in tank water, never tap water | Clears mechanical debris without killing beneficial bacteria — tap water kills the colony |
| Replace filter media (carbon) | Every 4–6 weeks | Carbon exhausts — biological media (sponge, ceramic) is permanent |
| Top up evaporation | As needed — use dechlorinated water | Evaporation removes water but leaves minerals behind — topped up water maintains volume and dilutes concentration |
The One Maintenance Mistake That Crashes Cycled Tanks
Cleaning filter media in tap water. This is the most common cause of a fully cycled tank suddenly developing an ammonia spike weeks or months after establishment. The beneficial bacteria that process ammonia and nitrite live primarily in the filter media — rinsing with chlorinated tap water kills them instantly. Always rinse filter media in a bucket of old tank water removed during a water change. A slight discolouration or visible debris on filter media does not mean it needs replacing — biological media (ceramic rings, sponge) is permanent and should never be fully replaced unless it is physically disintegrating.
Common First Tank Problems — And What They Actually Mean
Cloudy White Water (New Tank Syndrome)
White cloudy water in the first 2–5 days of a new tank is a bacterial bloom — heterotrophic bacteria processing the initial organic matter in the water before the nitrogen cycle bacteria establish. It is harmless, self-resolving within a few days without intervention, and actually signals that the biological process is beginning. Do not do large water changes to fix it — this removes the organic matter the bacteria are feeding on and extends the bloom. Wait it out.
Green Algae Bloom
Green water (not to be confused with green algae on glass) is a phytoplankton bloom caused by excess light and nutrients — usually in a new tank with too many hours of light or a tank placed near a window. Reduce the light period to 6–8 hours daily, ensure the tank is not receiving any natural sunlight, and perform a water change to reduce dissolved nutrients. Green water resolves within a week of addressing the light source.
Fish at the Surface Gasping
Fish gasping at the water surface is an oxygen emergency — either dissolved oxygen is critically low (too warm, no surface agitation, overstocked) or ammonia is spiking and burning gill tissue. Test water immediately. If ammonia is above 0.5 ppm, perform a 30–50% water change immediately. If ammonia is zero, increase surface agitation — the filter output should visibly disturb the water surface to facilitate gas exchange.
Ich (White Spot) in a New Tank
Small white spots on fish (resembling salt grains) in a new tank is almost always Ich — introduced on fish from the pet store or triggered by temperature stress during transport and acclimation. Begin treatment immediately — Ich progresses rapidly at tropical temperatures. See the Tropical Fish Temperature Guide for the temperature treatment protocol, or use a standard Ich medication in tanks that cannot safely raise temperature.
Fish Not Eating
New fish typically do not eat for 24–72 hours after introduction — this is normal stress behaviour. Do not overfeed trying to entice them. If a fish has not eaten for more than 5 days, check water parameters, check temperature, and observe for other symptoms. A fish that is active, alert, and showing normal colour but not eating is usually still settling in. A fish that is lethargic, hiding, and has clamped fins alongside not eating is showing disease signs that warrant closer investigation.
Beginner-Friendly Fish Stocking Guide
The “one inch of fish per gallon” rule is outdated and insufficient as a stocking guide — it doesn’t account for bioload, swimming level, or species behaviour. This is a more practical starting point:
| Tank Size | Recommended Starter Stock | Notes |
|---|---|---|
| 5–10 gallons | 1 betta, or 6–8 ember tetras, or a shrimp colony | Do not mix multiple species in nano tanks — limited stability margin |
| 20 gallons | 8–10 neon/cardinal tetras + 6 corydoras + 1 centerpiece fish (honey gourami or dwarf gourami) | Classic beginner community — compatible temperatures, swimming levels, and temperaments |
| 29 gallons | 10 harlequin rasboras + 6 corydoras + pair of angelfish or a school of rummy nose tetras | More species flexibility at 29 gallons — room for mid and upper schoolers |
| 40+ gallons | Multiple schools across three levels + bottom dwellers + a centrepiece species | Three-level stocking (top, middle, bottom) makes the most of tank space and reduces competition |
Frequently Asked Questions — Setting Up a Fish Tank
How long does it take to set up a fish tank?
The physical setup — tank, substrate, décor, filter, heater — takes 2–3 hours. The nitrogen cycle that must complete before adding fish takes 4–6 weeks. Total time from unboxing to first fish: 4–6 weeks when done correctly. If you are not prepared to wait through the cycle period, the result is almost always dead fish, wasted money, and a frustrating first experience with the hobby. The cycle wait is not optional — it is the difference between a thriving tank and a failing one.
How often should I change the water in a fish tank?
A 25–30% water change weekly is the standard recommendation for most community tanks. This removes accumulated nitrates (the end product of the nitrogen cycle) and replenishes trace minerals that fish need. In heavily stocked tanks or tanks with large fish, 30–40% weekly changes may be needed. In lightly stocked planted tanks, every 2 weeks may be sufficient. The measure to watch is nitrate — if it stays below 20–40 ppm between water changes, your change frequency is adequate. If it climbs above 40 ppm before your change day, increase frequency or volume.
What fish are best for a beginner fish tank?
For a 20-gallon beginner community tank, the most forgiving species combinations include: neon tetras, cardinal tetras, and harlequin rasboras for schooling fish; bronze or peppered corydoras for bottom level; honey gouramis or dwarf gouramis as a centrepiece. Avoid fish labelled “semi-aggressive” for a first tank — cichlids, tiger barbs, and serpae tetras will stress or injure peaceful tank mates. Avoid goldfish — they are coldwater fish incompatible with tropical heater setups and produce far more waste than their size suggests.
Do I need a filter for a fish tank?
Yes — a filter is non-negotiable for any fish tank other than a heavily planted nano tank specifically designed to run without one (a “walstad method” tank, which is an intermediate technique, not a beginner approach). The filter houses the beneficial bacteria that process ammonia and nitrite — without it, fish are living in their own toxic waste. No water conditioner, no product, and no amount of water changes substitutes for biological filtration in a standard aquarium setup.
Can I use tap water for a fish tank?
Yes — with a dechlorinator added before use. Tap water is suitable for most freshwater tropical fish after chlorine and chloramine are neutralised with a standard water conditioner. Check your tap water’s pH, hardness (GH), and carbonate hardness (KH) with a test kit — most community fish tolerate a wide range of parameters as long as they are stable, but sensitive species (discus, cardinal tetras, soft-water cichlids) may require remineralised RO water if your tap water is very hard or alkaline.
How do I know when my tank is cycled?
A tank is fully cycled when you dose it to 2 ppm ammonia and both ammonia and nitrite read zero within 24 hours using a liquid test kit. Nitrate will be elevated — this is the expected end product. Do a large 50–70% water change to bring nitrate below 20 ppm, then add your first fish. Test water parameters every 2–3 days for the first two weeks after stocking to confirm the cycle holds under live fish load.
The Setup Summary — In the Right Order
- Choose tank size — 20 gallons for most beginners
- Choose and prepare location — level, away from sunlight, near power and water
- Rinse substrate and décor — no soap, ever
- Build the hardscape and install equipment (not plugged in yet)
- Fill with dechlorinated tap water
- Start filter and heater — verify temperature after 24 hours with an independent thermometer
- Cycle the tank — 4–6 weeks fishless cycling with ammonia dosing and regular liquid test kit readings
- Confirm cycle completion — 0 ppm ammonia and nitrite within 24 hours of a 2 ppm dose
- Large water change — bring nitrate below 20 ppm
- Add first fish — slowly, 25–30% of planned stock at a time, with proper temperature acclimation
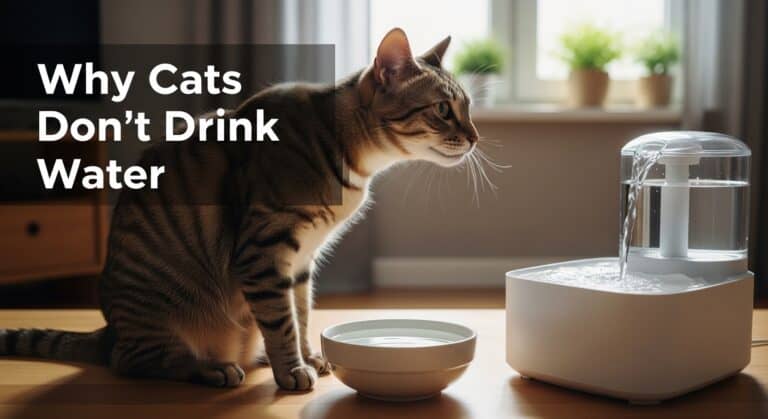
For heater selection matched to your tank size, see the Best Aquarium Heater 2026 guide. For temperature requirements by species, see the Tropical Fish Temperature Guide. Both are required reading before your first fish purchase.
Affiliate Disclosure: GearForPet.com participates in affiliate programs. We may earn a small commission if you purchase through our links at no extra cost to you. Read our full disclosure.